Turn your old laptop into a Clawdbot (now Moltbot) personal AI assistant that manages emails, schedules tasks, and controls your smart home—using WhatsApp or Telegram. No subscriptions. No cloud spying. Just a fully self-hosted AI agent.
Clawdbot (now Moltbot), an open-source project by Peter Steinberger, has earned 9,000+ GitHub stars and integrates with 50+ apps like Gmail, Slack, and Discord—all running locally on your hardware.
This guide shows you how to install Clawdbot step by step and run a 24/7 AI assistant from your phone.
What Is Clawdbot (now Moltbot)?
Clawdbot (now Moltbot) is not a typical chatbot. It is a Moltbot personal AI assistant that runs on your laptop and works like a proactive digital teammate.
Once launched, Moltbot handles real-world tasks across the platforms you already use:
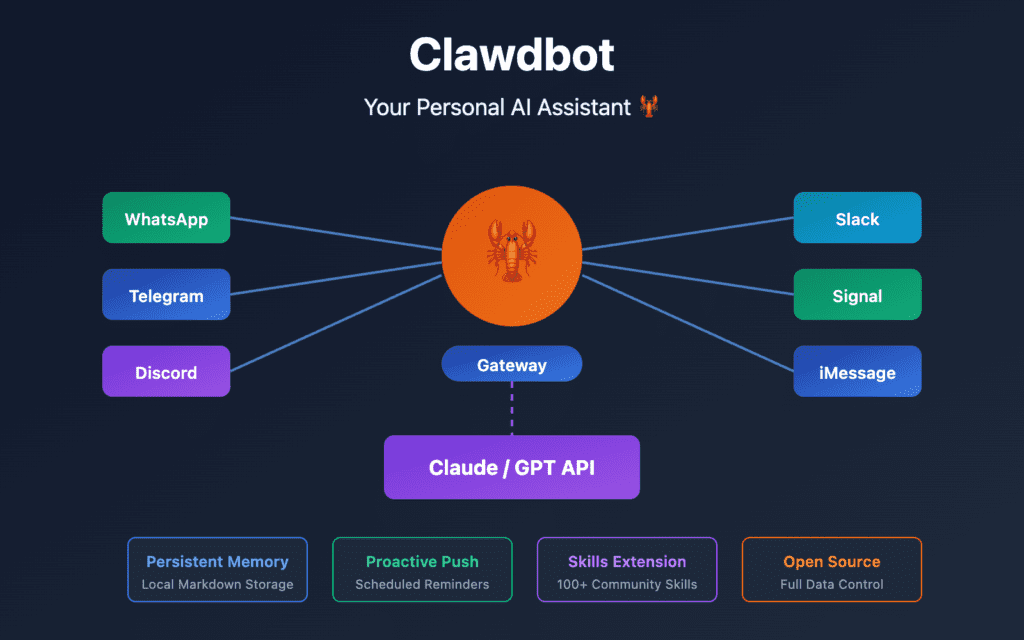
- Seamless messaging: Works with WhatsApp, Telegram, Discord, Signal, iMessage, Slack, Teams, and web chat.
- Smart memory: Remembers conversations, learns preferences, and sends proactive alerts like flight delays or reminders.
- Powerful actions: Browses the web, writes and runs code, schedules tasks, reads files, and controls apps or browsers.
- Self-evolving skills: Automatically creates and installs new capabilities, such as summarizing PDFs or generating reports.
Unlike cloud-based AI assistants, Moltbot runs entirely locally, ensuring privacy, security, and zero vendor lock-in. Many users describe it as “the AI Siri should have been” or “Jarvis for everyday users.”
The reason for the hype? Moltbot turns conversation into action.
Also Read: AI Agents Are Taking Over– Are They Replacing You Soon?
Why Install Moltbot on an Old Laptop?
That unused 2015 laptop can become a powerful Moltbot self-hosted AI agent—no new hardware needed.
Here’s why it’s a game-changer:
- Save money: Free software with optional low-cost APIs beats expensive cloud subscriptions.
- Stay private: All data runs locally, with no third-party access.
- Run 24/7: Dedicated hardware means constant availability.
- Do more: Automate emails, code reviews, smart devices, and custom workflows.
As creator Peter Steinberger puts it, “AI as a teammate, not a toy.”
Install Moltbot and put your old laptop to work.
System Requirements Before You Install Moltbot
Most laptops from 2018 or newer run Moltbot without issues. Check these basics before proceeding with how to install Moltbot :
- OS: Windows (WSL2), macOS 12+, or Linux
Recommended: Ubuntu 22.04+ or macOS Ventura - Node.js: v22.0+ (v22 LTS recommended)
- RAM: 4 GB minimum, 8 GB+ recommended
- Storage: 10 GB free (20 GB+ SSD preferred)
- Internet: Stable broadband (VPN like Tailscale helps with remote access)
To verify Node.js, open a terminal and run: node -v.
If it’s below v22, update before continuing.
Bonus: Raspberry Pi 4/5 and older MacBooks work well for always-on setups.
How to Install Moltbot Step-by-Step (Full Tutorial)
How to install Moltbot takes 10-20 minutes. Follow precisely—copy-paste commands. We’ll build your Moltbot self hosted ai agent from scratch.
Open terminal (macOS/Linux) or PowerShell (Windows). Let’s go.
Step 1: Prepare Your Old Laptop
Keep it simple:
- Update OS:
- macOS: System Settings > General > Software Update.
- Ubuntu/Debian:
sudo apt update && sudo apt upgrade -y. - Windows: Settings > Update & Security (install WSL2 first—essential).
- Install Node.js v22+: Grab from nodejs.org. Restart terminal.
Verify: node -v → ≥22.x.x. Good? Move on.
How to Install Moltbot Step-by-Step (Full Tutorial)
Installing Moltbot takes about 10–20 minutes. Follow the steps carefully and copy the commands exactly to build your Moltbot self-hosted AI agent from scratch.
Open Terminal (macOS/Linux) or PowerShell (Windows), then continue.
Step 1: Prepare Your Laptop
First, make sure your system is up to date:
- macOS: System Settings → General → Software Update
- Ubuntu/Debian:
sudo apt update && sudo apt upgrade -y
- Windows: Settings → Update & Security
(Install WSL2 first—it is required for best performance.)
Next, install Node.js v22 or higher from nodejs.org and restart your terminal.
Verify the installation:
node -v
If the version is 22.x.x or higher, you are ready to proceed.
Step 2: Install Moltbot CLI Globally
Run the following command:
npm install -g clawdbot@latest
Optional (faster alternative):
pnpm add -g clawdbot@latest
Confirm installation:
clawdbot --help
If you see available commands, Moltbot is successfully installed.
Pro tip: If you get a “command not found” error, add ~/.npm-global/bin to your PATH.
Step 3: Run the Onboarding Wizard
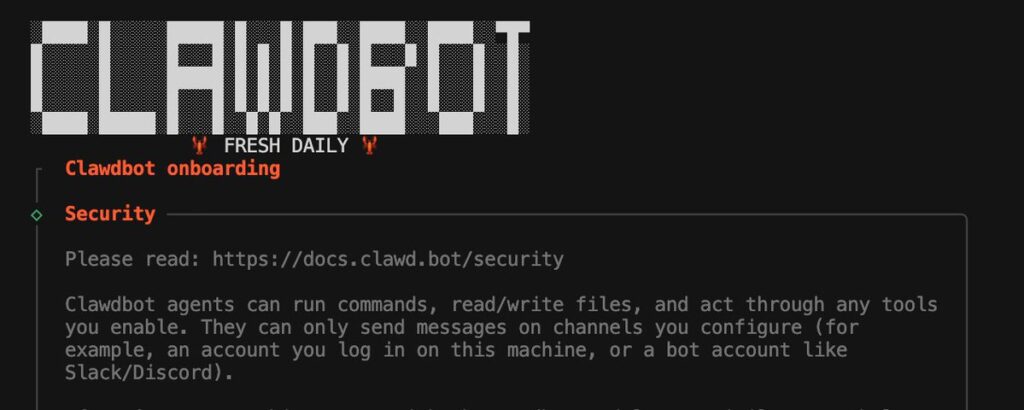
This interactive setup initializes your Moltbot personal AI assistant and runs the background daemon.
Run:
clawdbot onboard --install-daemon
What this does:
- Creates a workspace:
~/.clawdfor skills, memory, and configuration - Starts the gateway: Listens on port 18789
- Installs the daemon: Auto-starts on boot (systemd on Linux, launchd on macOS)
- Sets core behavior: Initializes basic personality in
SOUL.md
Accept the default options for a standard Moltbot self-hosted AI agent. The process takes about 1–2 minutes.
Verify installation:
clawdbot status
Status should show “healthy.”
Tip: If you hit permission errors, rerun the command with sudo on Linux or macOS.
Step 4: Authenticate Your AI Model
Moltbot needs an LLM to function. Choose a provider during onboarding or configure one manually. For best results, use a hosted model.
Recommended options:
- Anthropic (Best): Claude 3.5 Sonnet or Opus — long context, secure, highly capable
- OpenAI: GPT-4o — fast and versatile
- Local (Advanced): Ollama with Llama 3 — fully offline and free
During the wizard, you will be prompted to paste your API key.
Alternatively, add it manually by editing:
~/.clawdbot/clawdbot.json
Example:
{
  "providers": {
    "anthropic": {
      "apiKey": "your-key-here"
    }
  },
  "defaultModel": "claude-3-5-sonnet-20241022"
}
Restart the gateway:
clawdbot gateway restart
Test the setup:
clawdbot agent --message "Test"
If it responds, your Clawdbot personal AI assistant is fully operational.
Step 5: Start the Gateway
The gateway is Moltbot’s core engine. It manages sessions, channels, tools, and events.
Run:
clawdbot gateway --port 18789 --verbose
What this does:
- Serves HTTP/WebSocket on
localhost:18789 - Loads your AI model, memory, and skills
- Displays live logs with
--verbose
Check status:
clawdbot status
You should see “Gateway: healthy” and an active model.
Auto-start: The daemon from Step 3 handles reboots.
Manual restart:
clawdbot gateway restart
Open http://localhost:18789 in your browser. If the dashboard loads, your Clawdbot self-hosted AI agent is live.
Troubleshooting:
- Port in use:
lsof -ti:18789 | xargs kill -9
- Firewall blocking access: allow port 18789
Step 6: Connect Your First Channel (WhatsApp)
Channels let you access Moltbot from your phone. WhatsApp is the fastest to set up.
Run:
clawdbot channels login whatsapp
Setup steps:
- A QR code appears in the terminal
- Open WhatsApp → Settings → Linked Devices → Link Device
- Scan the QR code immediately
- Grant required permissions
To restrict access, edit:
~/.clawd/channels/whatsapp.json
Add allowed numbers, for example:
"+1234567890": true
Test it by sending “Moltbot hi!” on WhatsApp. You should get an instant reply.
You can connect other channels the same way:
Telegram, Discord, Slack, Signal (QR or OAuth-based setup).
Security note: Unknown senders are blocked by default.
Your Moltbot personal AI assistant is now live on your phone.
Step 7: Send Your First Message
Your Moltbot self-hosted AI agent is ready. Time to test it.
CLI test (fastest):
clawdbot agent --message "Hello Clawdbot, summarize my day ahead" --thinking high
You should receive a detailed response using calendar data, weather, or news.
The --thinking high flag enables deeper reasoning.
Phone test (recommended):
Send a message on WhatsApp or Telegram:
@Clawdbot what's up?
Moltbot replies instantly and remembers context.
You’ll know it’s working when you see:
- Context-aware responses
- Proactive follow-ups
- Suggestions to install or use new skills
That old laptop is now a fully functional Moltbot AI powerhouse.
Configuring Moltbot for Daily Use
Moltbot becomes truly powerful once you customize it for your workflows.
Customize Your Personality
Edit:
~/.clawd/SOUL.md
Example:
You are Clawd, my proactive, privacy-first assistant. Speak casually and suggest actions.
Apply changes:
clawdbot gateway restart
Moltbot now responds in your voice.
Add Custom Skills
Skills extend what Clawdbot can do. Create one in:
~/.clawd/skills/my-skill/SKILL.md
Example use cases include weather reports, email triage, or code reviews.
Install:
clawdbot skills install my-skill
Ask Clawdbot to use it—results are instant.
Enable Voice Mode (Optional)
For hands-free use:
- Get an ElevenLabs TTS API key
- Add it to
clawdbot.jsonunder"tts"
You can now trigger voice replies on macOS, iOS, or Android.
Automate with Cron Jobs
Schedule daily tasks in:
~/.clawd/cron.yaml
Example: an 8 AM briefing with weather, calendar, and news.
Start automation:
clawdbot cron start
That’s it—your Clawdbot personal AI assistant is fully optimized for daily use.
Also Read: 7 Best Free Open Source AI Agents To Transform Your Workflow
Best Practices for Moltbot Security
Clawdbot is privacy-first by design, but proper configuration is essential to fully protect your Moltbot self-hosted AI agent.
Built-In Protections
- DM-only access: Unknown senders are blocked until allowlisted
- Prompt-injection resistance: Model safeguards and sandboxing reduce jailbreak risks
- Controlled memory: Data can be wiped instantly with built-in memory controls
Essential Hardening Steps
- Run a health check:
clawdbot doctor
Fix any flagged issues immediately.
- Secure API keys: Store keys in
.envfiles or your system keychain, not plain JSON. - Isolate risky tasks: Run non-critical sessions in Docker:
clawdbot agent --docker
- Safe remote access: Use Tailscale with gateway access restricted to your tailnet.
- Stay updated:
npm update -g clawdbot
Apply updates weekly.
- Audit regularly: Review logs in
~/.clawd/logs/.
A secured Clawdbot setup delivers powerful automation without sacrificing privacy.
Troubleshooting Common Installation Issues
If you are stuck on how to install Moltbot, these fixes resolve most problems quickly.
“clawdbot: command not found”
Cause: npm global path not in PATH.
Fix:
npm config get prefix
echo 'export PATH="$HOME/.npm-global/bin:$PATH"' >> ~/.zshrc
source ~/.zshrc
Restart the terminal.
WhatsApp QR Code Expires
Cause: Network delay.
Fix: Re-run:
clawdbot channels login whatsapp
Scan within 30 seconds. Use stable Wi-Fi or a phone hotspot.
Gateway Won’t Start (Port Error)
Cause: Port 18789 already in use.
Fix:
lsof -ti:18789 | xargs kill -9
clawdbot gateway --port 18790
Update the port in config if needed.
Windows Install Fails
Fix: Use WSL2 + Ubuntu and repeat the setup inside WSL. Native Windows installs are unreliable.
High CPU on Older Laptops
Fixes:
- Use
--thinking low - Reduce active channels
- Switch to a local model (Ollama + Llama 3)
Most issues are resolved here. For edge cases, the official docs and Discord community cover nearly everything.
What’s Next After Installing Moltbot?
Your Moltbot personal AI assistant is live. Now it’s time to level up.
Quick Wins
- Explore skills: Install ready-made tools from ClawdHub—email sorting, GitHub reviews, weather, and more.
- Build your own: Create custom skills with:
clawdbot skills new fitness-coach
Edit SKILL.md and deploy.
- Join the community: Connect on Discord to share setups and get help from thousands of users.
- Go advanced: Enable remote access, voice wake words, or run Clawdbot across multiple machines.
- Track usage:
clawdbot stats
See messages handled and skills used.
You’ve unlocked a full Moltbot self-hosted AI agent.
Experiment, optimize—and decide what your first custom skill will be.
Conclusion: Start Using Moltbot Today
You now know how to install Moltbot —and how to turn an old laptop into a powerful Moltbot personal AI assistant and self-hosted AI agent that rivals cloud-based tools.
What you gain:
- Private, always-on AI across WhatsApp, Slack, and Telegram
- Custom skills, automations, and optional voice control
- Zero subscriptions and full ownership of your data
Getting started takes minutes:
npm install -g clawdbot@latest
If Moltbot helped you automate something meaningful, share your first win with the community.
Reclaim your hardware. Control your AI. Start today.